
BN-Link’s 7-day timers offer convenient automation for homes, controlling lamps, fans, and appliances. These digital timers, like the dual-outlet models, simplify scheduling with ease!
These timers boast simple setup, customizable programs, and even accommodate daylight saving time, providing unmatched convenience for daily routines and energy management.
What is the BN-Link 7-Day Timer?
The BN-Link 7-Day Timer is a programmable electronic device designed to automate the on and off switching of electrical appliances. Available in single and dual outlet configurations, these timers offer a user-friendly solution for controlling lights, fans, heaters, and other household devices.
Essentially, it acts as a digital light switch, allowing users to pre-set schedules for when devices should operate. Models like the BND-60 and U78/U1 are built for both indoor and heavy-duty outdoor applications. They feature an LCD display for easy programming and typically support up to 8 or 18 on/off programs, offering flexibility in scheduling.
The timer’s core function is to enhance convenience and potentially save energy by automating appliance operation, eliminating the need for manual control.
Key Features and Benefits
BN-Link 7-Day Timers boast several key features, including a simple setup and operation, making them accessible for all users. The programmable nature allows for customized schedules, with options for individual days or pre-set combinations. Dual outlet models maximize convenience, controlling two appliances simultaneously.
Benefits extend to energy savings by automating appliance usage and eliminating standby power consumption. The inclusion of Daylight Saving Time functionality ensures accurate scheduling year-round. Many models are ETL listed, guaranteeing safety and adherence to industry standards.
Furthermore, the ability to switch between AUTO and MANUAL modes provides flexible control, and the heavy-duty options offer increased load capacity for demanding applications.
Typical Applications: Lamps, Fans, Appliances
BN-Link 7-Day Timers excel at automating a wide range of household devices. Commonly, they’re used to control interior and exterior lamps, providing security through simulated occupancy while away. Fans benefit from scheduled operation, optimizing comfort and energy efficiency.
Beyond lighting and cooling, these timers are ideal for appliances like coffee makers, space heaters, or holiday decorations. Imagine waking up to a freshly brewed pot of coffee or having festive lights turn on automatically each evening!
The 15A/1875W capacity accommodates many standard appliances, and the dual-outlet models expand possibilities; From aquariums to small kitchen appliances, the BN-Link timer offers versatile control and convenience throughout your home.

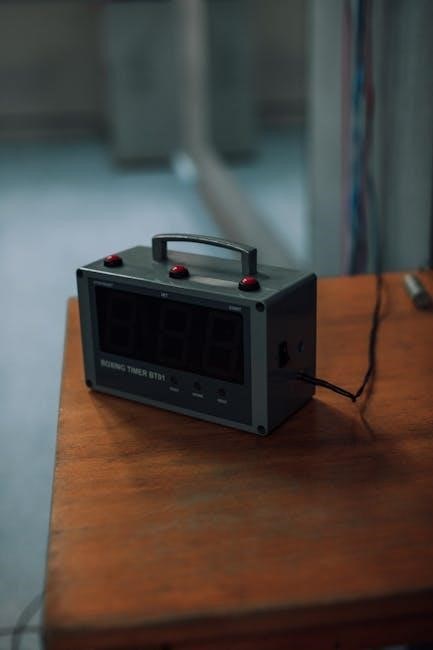
Understanding the Timer’s Components
BN-Link timers feature an LCD display panel, intuitive buttons for programming, and a standard three-prong plug. Proper understanding ensures easy operation and setup!
The Display Panel Explained
The BN-Link timer’s display panel is crucial for monitoring and adjusting settings. Typically, the screen showcases the current time and date, alongside the programmed on/off schedule for each day of the week.
Icons indicate the active mode – AUTO for scheduled operation or MANUAL for direct control. Some models display the day of the week prominently, while others use numerical representations. The display also often shows which programs are currently active.
Pay attention to any indicator lights, as they can signal power status, program execution, or potential errors. A clear understanding of the display panel’s information is essential for effective timer management and troubleshooting.
Buttons and Their Functions
The BN-Link timer features several buttons for programming and operation. Key buttons include “SET” or “PROGRAM” for accessing scheduling options, “HOUR” and “MINUTE” for time adjustments, and “DAY” for selecting the day of the week.
“ON” and “OFF” buttons define the on/off times for each program. A “MODE” button toggles between AUTO and MANUAL operation. Some models include a “RESET” button to restore factory defaults.
Often, holding down the “SET” or “PROGRAM” button allows for quick cycling through settings. Familiarizing yourself with each button’s function is vital for efficient timer programming and control, ensuring your devices operate as intended.
Powering the Timer and Initial Setup
To begin, plug the BN-Link timer into a standard grounded electrical outlet. Ensure the outlet is functioning correctly. Upon initial power-up, the display will likely illuminate, potentially showing a default time or prompting for time and date settings.
Before programming, it’s crucial to set the current time and date accurately. Use the “HOUR” and “MINUTE” buttons to adjust the time, and the “DAY” button to set the correct date. Some models may require holding the “SET” button to confirm each setting.
Verify the time display is correct before proceeding to create on/off schedules. Proper initial setup ensures the timer functions as expected, automating your devices reliably.

Programming the BN-Link Timer: Basic Operations
BN-Link timers utilize simple programming for on/off schedules. Customize individual days or use pre-set combinations, tailoring timing to your specific needs effortlessly.
Setting the Current Time and Date
Accurate time and date are crucial for proper timer function. Begin by pressing the “Clock” or “Time Set” button – consult your specific model’s instructions for the exact label. The hour display will likely flash, indicating it’s ready for adjustment.
Use the “Hour” and “Minute” buttons to set the current time. Pay close attention to AM/PM indicators, if present. Once the time is correct, press the “Clock” or “Time Set” button again to confirm. Next, set the date, often accessed through a separate “Day,” “Date,” or “Month” button.
Navigate through the month, day, and year using the appropriate buttons, confirming each selection with another press of the “Clock” or “Time Set” button. Ensure the date format is correct for your region. A correctly set time and date are foundational for all programmed schedules.
Understanding On/Off Programs
BN-Link timers utilize “On/Off” programs to automate your devices. These programs define specific times when connected appliances will turn on or off. Most models allow up to eight distinct programs, offering considerable scheduling flexibility. Each program consists of a start time, days of the week for activation, and whether the outlet should be “On” or “Off” at that time.
Think of each program as a single instruction: “Turn on the lamp at 6:00 PM every weekday.” You’ll input these instructions using the timer’s buttons. The timer executes these programs sequentially, creating a customized schedule. Understanding this program structure is key to effectively automating your home.
Pre-set program combinations offer quick setup, while individual customization provides granular control.
Creating a Simple On/Off Schedule
To create a schedule, begin by setting the current time and date (refer to the previous section). Then, press the “Program” or “Set” button to enter programming mode. Use the “Hour” and “Minute” buttons to define the desired “On” time for your first program. Select the days of the week this program should apply to – options include individual days or pre-set combinations.
Next, set the “Off” time using the same process. Repeat these steps for each additional On/Off program you wish to create, up to the timer’s maximum capacity (typically eight programs). Remember to save each program after inputting the details.
Finally, ensure the timer is in “AUTO” mode for the schedule to activate.

Advanced Programming Options
BN-Link timers offer pre-set program combinations for quick setup, plus customization for individual days. Daylight Saving Time functionality ensures accurate scheduling year-round.
These features provide flexibility and precision, tailoring the timer to specific needs and maximizing convenience.
Using Pre-Set Program Combinations
BN-Link timers simplify scheduling with convenient pre-set program combinations. These options eliminate the need for individual day programming, offering a quick and easy setup for common routines.
Typically, these combinations include settings like “All Days On,” “Weekdays On, Weekends Off,” or variations thereof. Selecting a pre-set program involves navigating the timer’s menu and choosing the desired option using the control buttons.
This is ideal for users who want consistent scheduling without the complexity of customizing each day individually. The timer’s display will confirm the selected program, and the appliance will then operate according to that schedule. Remember to verify the program aligns with your intended usage!
These pre-sets are a great starting point, and can always be further customized if needed.
Customizing Individual Days
BN-Link timers allow for granular control by enabling customization of each day’s schedule independently. This feature is perfect for routines that vary throughout the week. To customize, access the programming mode and select the specific day you wish to modify – Sunday through Saturday.
Within each day, you can set multiple on/off programs, defining precise times for your appliances to activate or deactivate. Use the timer’s buttons to input the desired hour and minute for each program.
Remember to save your changes after setting each program. This level of customization ensures your lights, fans, or other devices operate exactly when you need them, maximizing convenience and energy efficiency.
Review each day’s settings to confirm accuracy before relying on the automated schedule.
Daylight Saving Time Functionality
BN-Link timers are designed to automatically adjust for Daylight Saving Time (DST), simplifying seasonal time changes. While specific implementation varies by model, many timers handle DST transitions without requiring manual intervention. The timer typically detects the DST change and automatically shifts the programmed times forward or backward by one hour.
However, it’s crucial to verify that your specific BN-Link timer model supports DST functionality. Consult the instruction manual for details on how DST is handled. Some models may require a manual setting adjustment to enable or disable DST.
Always double-check the time display after a DST transition to ensure the timer is operating correctly and maintaining accurate scheduling.

Operating Modes: AUTO and MANUAL
BN-Link timers feature AUTO mode for scheduled on/off cycles and MANUAL mode for instant, temporary control, overriding the programmed schedule effortlessly.
Simply press and hold the button to switch between modes, offering flexible operation for diverse needs.
Switching Between AUTO and MANUAL Modes
The BN-Link timer’s operational flexibility lies in its AUTO and MANUAL modes. Transitioning between these is straightforward, designed for user convenience. To switch, locate the designated button – often clearly marked – on the timer’s face. Typically, a press and hold of this button initiates the mode change.
In AUTO mode, the timer diligently follows the programmed on/off schedule you’ve established. This is ideal for consistent, hands-free operation. Conversely, MANUAL mode allows for immediate control, overriding the schedule. This is useful for temporary adjustments or when you need to operate the connected device outside of its programmed times.
The timer will usually provide a visual indicator – a light or display icon – to confirm the currently selected mode. Remember to check this indicator to ensure the timer is operating as intended. This simple process empowers you to seamlessly manage your devices according to your needs.
Using MANUAL Mode for Temporary Control
MANUAL mode on the BN-Link timer provides immediate, overriding control of the connected device, bypassing the programmed schedule. Engaging this mode is perfect for situations requiring temporary operation outside of the set timings. Once activated, the device will either turn ON or OFF, depending on its current state, and remain in that state until you manually change it again.
This is particularly useful for unexpected needs – perhaps you want to leave a lamp on longer than scheduled, or turn off a fan unexpectedly. Importantly, remember that changes made in MANUAL mode are not saved to the programmed schedule.
When you return to AUTO mode, the timer will revert to its pre-defined program. This ensures your regular schedule resumes without requiring reprogramming. MANUAL mode offers a convenient, temporary solution without disrupting your long-term automation setup.
AUTO Mode for Scheduled Operation
AUTO mode is the core functionality of the BN-Link 7-day timer, enabling fully automated control of your connected devices. When set to AUTO, the timer diligently follows the programmed on/off schedule you’ve created, operating independently without requiring manual intervention. This allows for consistent, hands-free operation, ideal for daily routines like lighting or appliance control.
The timer will automatically switch devices on and off at the pre-defined times for each day of the week, or according to any customized daily settings you’ve implemented. This mode is perfect for energy saving, security, or simply adding convenience to your life.
Ensure your schedule is accurately programmed before switching to AUTO to guarantee the desired operation. Returning to AUTO after using MANUAL mode instantly restores your programmed schedule.

Troubleshooting Common Issues
Common problems include the timer failing to power on, displaying incorrect times, or programs not executing. Check power connections and ensure correct programming!
Timer Not Powering On
If your BN-Link timer isn’t powering on, begin by verifying the power outlet is functioning correctly. Test the outlet with another device to confirm it’s receiving power. Next, inspect the timer’s power cord for any visible damage, such as cuts or fraying. Ensure the cord is securely plugged into both the timer and the outlet.
Also, double-check that the timer hasn’t exceeded its maximum load capacity of 15A/1875W. Overloading the timer can prevent it from powering on. If the issue persists, try resetting the timer to its factory defaults (refer to the ‘Resetting the Timer’ section for instructions). A reset can resolve internal glitches. Finally, confirm the unit is intended for indoor use only, as outdoor models have different specifications.
Incorrect Time Display
An incorrect time display on your BN-Link timer requires resetting the current time and date. Access the timer’s settings, typically by pressing and holding the ‘Clock’ or ‘Time’ button. Use the ‘Hour’ and ‘Minute’ buttons to adjust the time accurately. Confirm the correct AM/PM setting. For date adjustments, navigate to the date setting within the menu, using the appropriate buttons to set the month and day.
Remember to account for Daylight Saving Time; the timer includes functionality to adjust automatically. If the display remains inaccurate after resetting, consider a full factory reset (see ‘Resetting the Timer’). Ensure a stable power supply during the setting process to prevent data loss. A properly set time is crucial for accurate scheduling.
Programs Not Executing as Expected
If your BN-Link timer’s programs aren’t running as scheduled, first verify the timer is in ‘AUTO’ mode. Double-check each on/off program for accuracy – confirm the correct times and days are programmed. Ensure there are no overlapping programs causing conflicts. Review the pre-set program combinations if utilized, to confirm they align with your desired schedule.
A power outage can reset the timer, requiring reprogramming. Also, confirm the connected appliance is functioning correctly. If issues persist, try deleting and recreating the problematic program. A factory reset (refer to the ‘Resetting the Timer’ section) can resolve complex software glitches. Finally, ensure the timer’s internal battery (if applicable) isn’t depleted.

Safety Precautions and Specifications
BN-Link timers have a 15A/1875W maximum load capacity and are ETL listed for safety. They are designed for indoor use only, protecting against the elements.
Maximum Load Capacity (15A/1875W)
Understanding the power limitations of your BN-Link 7-Day Timer is crucial for safe and effective operation. This timer is rated for a maximum load of 15 Amps (15A) at 125 Volts, which translates to a maximum wattage of 1875 Watts (1875W).
Exceeding this limit can pose a significant fire hazard and may damage the timer itself, as well as the connected appliances. Always check the wattage rating of the devices you intend to plug into the timer.
For resistive loads like lamps and heaters, the wattage is typically clearly marked. However, for inductive loads like motors (found in fans or some appliances), you may need to consider the starting wattage, which can be significantly higher than the running wattage.
If unsure, it’s always best to err on the side of caution and choose a lower wattage appliance or use a timer with a higher capacity.
Indoor Use Only
The BN-Link 7-Day Timer is specifically designed and certified for indoor use only. Exposing the timer to rain, snow, excessive humidity, or direct sunlight will compromise its safety features and potentially create a hazardous situation.
The internal components are not sealed against the elements, and moisture can cause short circuits, corrosion, and electrical shock. Using the timer outdoors voids any warranty and significantly increases the risk of malfunction or fire.
For outdoor applications, always choose a timer specifically rated and labeled for outdoor use, featuring a weatherproof enclosure and appropriate safety certifications.
Ensure the timer is plugged into a dry, indoor outlet, away from water sources. Following this simple precaution will ensure the longevity and safe operation of your BN-Link timer.
ETL Listing and Safety Standards
The BN-Link 7-Day Timer proudly carries an ETL Listing, signifying it has been rigorously tested and meets stringent North American safety standards. This certification, from Intertek, assures consumers that the timer has been evaluated for electrical safety and performance.
ETL Listing demonstrates the timer’s adherence to UL standards, even without the UL mark itself, providing equivalent safety assurance. This includes testing for shock hazards, fire resistance, and proper grounding.
When choosing a timer, always prioritize ETL or UL listed models to ensure product safety and reliability. Avoid uncertified timers, as they may pose a significant electrical risk.
The BN-Link timer’s ETL listing provides peace of mind, knowing it’s been independently verified to meet essential safety requirements for indoor use.

Comparing BN-Link Timer Models
BN-Link offers diverse timers: single/dual outlet, indoor/outdoor, and standard/heavy-duty options. Choose based on your needs – outlets, location, and power demands!
Single vs. Dual Outlet Timers
BN-Link provides both single and dual outlet 7-day timers, catering to varying automation requirements. Single outlet timers are ideal for controlling one device, such as a lamp or a small fan, offering a straightforward scheduling solution.
However, if you need to automate multiple appliances simultaneously, a dual outlet timer is the more efficient choice. These models feature two independently programmable outlets, allowing you to control two devices with a single timer. This eliminates the need for multiple timers, saving space and simplifying your setup.
Consider your current and future needs when selecting between these options. If you anticipate expanding your automated setup, investing in a dual outlet timer upfront can prove more cost-effective and convenient in the long run.
Indoor vs. Outdoor Timers
BN-Link offers timers specifically designed for both indoor and outdoor use, each with features tailored to their respective environments. Indoor timers, like the standard digital programmable models, are suitable for controlling lights, fans, and appliances within a sheltered space.
Outdoor timers, such as the heavy-duty BND-60, are built to withstand the elements – rain, snow, and varying temperatures. They typically feature a weatherproof enclosure and are designed for controlling outdoor lighting, holiday decorations, or irrigation systems.
It’s crucial to select the appropriate timer for its intended location. Using an indoor timer outdoors can lead to malfunction or safety hazards. Always check the product specifications to ensure it’s rated for outdoor use before exposing it to the elements.
Heavy Duty vs. Standard Timers
BN-Link provides both standard and heavy-duty 7-day timers, differing primarily in their maximum load capacity and intended applications. Standard timers, often rated at 15A/1875W, are ideal for typical household appliances like lamps and fans.
Heavy-duty timers, however, are designed to handle higher wattage devices. These are better suited for power tools, heating elements, or other appliances demanding significant electrical current. They offer increased durability and reliability under heavier loads.
Choosing the right timer depends on the connected device’s power requirements. Overloading a standard timer can cause damage or create a fire hazard. Always verify the appliance’s wattage and select a timer with a sufficient capacity.

Resetting the Timer to Factory Defaults
Resetting the BN-Link timer restores its original settings. This is useful for troubleshooting or preparing the timer for a new setup and schedule.
When to Reset the Timer
Consider resetting your BN-Link 7-Day Timer in several situations. If you’re experiencing unexpected behavior, such as programs not running correctly or the timer displaying incorrect information, a reset can often resolve these issues. Perhaps you’ve experimented with numerous settings and want to start fresh with a clean slate – a factory reset is ideal.
Furthermore, if you’re giving the timer to someone else or repurposing it for a completely different schedule, resetting it ensures they begin with the default configuration. It’s also a good practice to reset the timer after a power outage, especially if the display is malfunctioning or the programmed schedule seems lost. Essentially, any time the timer’s operation becomes erratic or you desire a fresh start, a reset is the recommended course of action.
Step-by-Step Reset Instructions
To reset your BN-Link 7-Day Timer to factory defaults, begin by ensuring the timer is plugged in and powered on. Locate the small “Reset” button – often recessed to prevent accidental presses – typically found on the timer’s front or side panel. You’ll likely need a straightened paperclip or similar small object to access it.
Gently press and hold the Reset button for approximately 5-10 seconds. The display should flicker or briefly go blank, indicating the reset process has begun. Release the button and allow the timer to reboot. Once restarted, all programmed schedules will be cleared, and the timer will revert to its original factory settings, ready for new configuration.
Post-Reset Configuration
Following a factory reset, your BN-Link timer requires complete reconfiguration. Begin by setting the current time and date accurately, as this forms the foundation for all scheduled programs. Navigate through the timer’s menu using the buttons, referencing the instruction manual for specific button functions.
Next, recreate your desired on/off schedules. You can either utilize the pre-set program combinations for quick setup or customize individual days to match your specific needs. Remember to confirm each program entry to ensure accuracy. Finally, verify the timer is in AUTO mode for scheduled operation, and test a program to confirm functionality.